Runner’s Knee

Runner’s Knee

By Jason Brayley, MD, Chief, KP Sports Medicine Sacramento

Dawn Levine, PhD

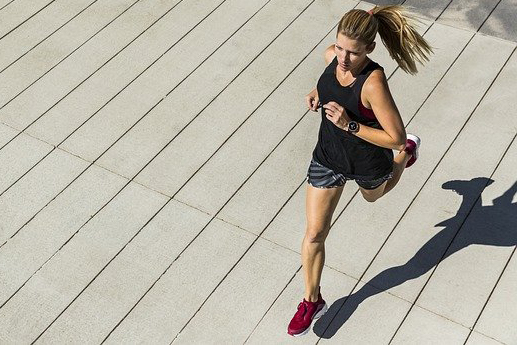
Patellofemoral Pain Syndrome, or “Runner’s Knee” as this bothersome condition is also commonly known, is a painful problem that typically presents as pain directly underneath the kneecap.  Runners may also experience very vague pain throughout the entire front portion of the knee.   Some runners experience distinct soreness to the touch when feeling along the inner and outer margins of the kneecap itself.  Unfortunately, patellofemoral pain can be a very common problem experienced by runners and may lead to disruption of training plans

The kneecap (or “patella”) is a bone that sits directly in the front of the knee joint within a groove of the femur, or thigh bone. The patella connects the powerful quadricep muscles of the thigh to the tibia (or shin bone) via thick connective tissue known as the quadricep and patellar tendons.  While the knee is a hinge joint that moves a runner forward by bending and extending, the patella withstands significant amounts of force during running.

Several factors can contribute to increased amounts of force underneath the kneecap that contribute to the pain associated with patellofemoral pain syndrome.  These may include:

  • Injury to the cartilage under the kneecap
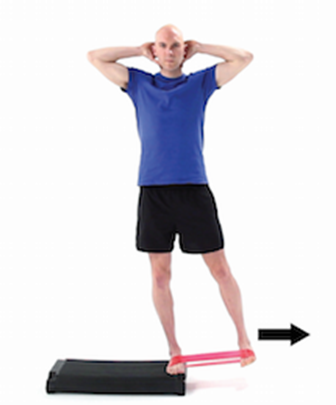
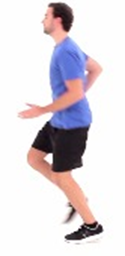
  • Poor overall running mechanics from muscles that are too tight or not quite strong enough to support the increased amount of training a runner is doing
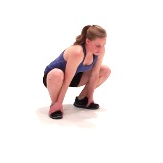
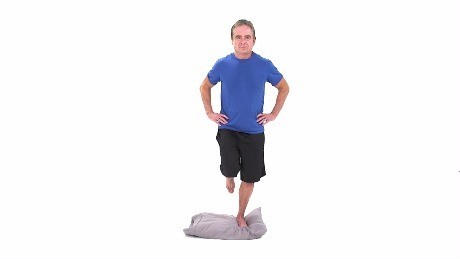
  • Deconditioned core, gluteal, hip, and quad muscles that fatigue at longer distances
  • Female runners may have more difficulty due to potentially wider hips than males, leading to an increased “Q angle” at the knee joint
  • Flat feet, worn out running shoes, and poor ankle stability may also contribute to increased force across the knee
  • Running up and down steep hills during training

If you begin to feel pain consistent with patellofemoral pain syndrome, it’s important you take action early to have the best chance of getting your pain under control quickly. If pain is occurring as soon as you start running, then a complete rest from running is in order.  Cycling and pool running are good alternative forms of cardiovascular training if these activities do not cause pain. Otherwise, consider reducing the total volume of running to about 50% of what you had been doing when pain began.

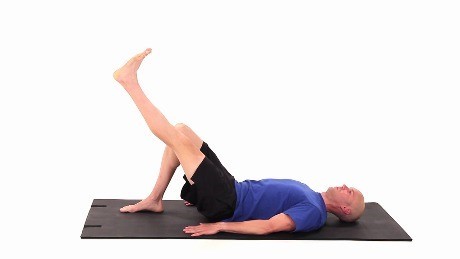
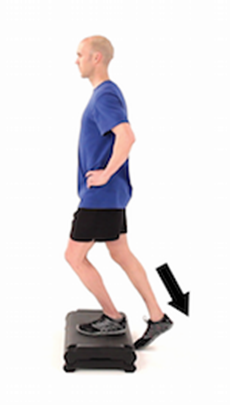
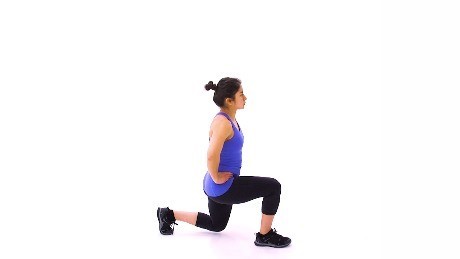
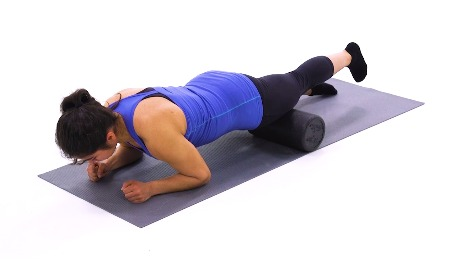
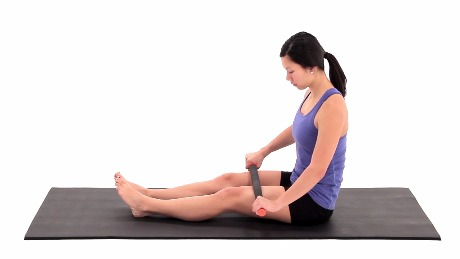
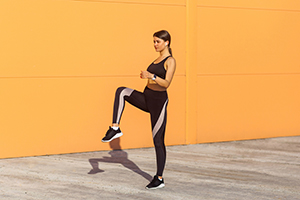
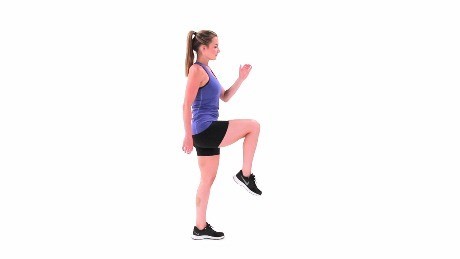
Icing the knees after completing a run can also help.  If you know how long or how much time it would typically take in the past to develop pain while running, make sure you end your runs just before that point. Work on flexibility of the hip flexor muscles, quadriceps, and hamstring muscles. If not working on a core and gluteal strengthening program, working on strength in these important areas of a runner’s body is very important to prevent knee pain from coming back when starting to train again. Once the pain has settled down, slowly start to ramp your training back up while continuing to work on flexibility and strength.

If your pain doesn’t settle down within a week or two, consider checking in with your Sports Medicine physician or physical therapist to make sure there is nothing more serious going on.

Check with your local running store and make sure that you’ve checked for wear patterns on your running shoes. Invest in a new pair if it looks like the shoe is not providing adequate support or is worn out.

While patellofemoral pain syndrome can be a highly bothersome problem for the runner who is excited about an upcoming event, don’t give up! Take some time to rest or modify training, work on strength and flexibility, make sure you’re running in the right shoes, and you’ll have an excellent chance of getting back to training feeling better than ever before.


Plantar Fasciitis

Plantar Fasciitis

By Scott Meier, MD, KP Sports Medicine Elk Grove

Dawn Levine, PhD

What is the Plantar Fascia and what is Plantar Fasciitis?

The plantar fascia is a thick tissue on the bottom of the foot that connects the heel bone to the base of the toes. This is helps support the arch of the foot and stabilize the structures around the bottom of the foot. Plantar fasciitis is a painful condition that involves inflammation and/or small tears of this tissue. The pain is often felt when pressure is placed on the bottom of the foot with standing, walking, running, or other similar motion.

What Causes Plantar Fasciitis?

Any one or a combination of stresses to this area can cause plantar fasciitis. It has been affiliated with increased walking, standing, stair-climbing or running that can occur with a new job or starting a new fitness program. It can also occur with increasing intensity or frequency of use in a job or workout program that is higher than the healing rate. It has also been associated with performing activity on a different terrain or surface than used prior. Other factors that have led to plantar fasciitis include having tight calf muscles, using high heels, being overweight or by having an arch that is not properly supported throughout the day. Another common cause is using a shoe with exercise that has worn out and no longer supports the foot sufficiently.


What are the Symptoms?

The main symptom is pain on the bottom of the foot, usually near the heel. Pain can worsen with weight bearing activity, especially first thing in the morning when getting out of bed.  This pain can improve as the day progresses with simple use, but often will hurt with higher intensity use.

How is it Treated? 

The best way to treat plantar fasciitis is to give it proper rest. The tears or micro tears of this tissue need to be given time to heal completely. Combinations of ice, NSAIDs, supportive shoes or inserts can help with this process.  

Ice is often used either in an ice bath, placing an ice pack on the foot or rolling a frozen water bottle on the bottom of the foot.  Finding the right shoe to support the arch varies for all foot types, so be sure to seek out help if needed and know that a couple types of inserts or shoes may need to be tried before you find the right combination. 

Walking barefoot without support may also contribute to delayed healing. If this pain persists, despite these adjustments, then you should seek advice from your physician or a specialist. They can help clarify if the above treatments need any adjusting and they may also suggest other options including physical therapy or more aggressive treatment like a boot, stiff shoe or crutches to allow this to heal. 

Other items that could be tried for continued pain may include a night splint, a cortisone injection or rarely this can progress to surgery. All of the possible causes (see above) should be considered both for treatment and when returning back to activity after healing. The goal should be to both help resolve this issue, but also control the stresses on this area to prevent it from returning.


Resiliency in Running

Resliency in Running Video

By: Dr. Gloria Rho, Kaiser Permanente Sports Medicine and Fleet Feet Coach Sally Phillips

Check out our new video, “Resiliency in Running” in which Fleet Feet Running Coach Sally Phillips, and Kaiser Permanente Sports Medicine Physician Dr. Gloria Rho discuss resiliency in running and walking, injury prevention, and nutrition.


Lower Extremity Strength Exercises for Runners

Lower Extremity Strength Exercises for Runners

By: Shana Urban PT, DPT, ATC, CSCS

Including strength training to your workouts can help make you a better runner. Getting stronger will also help prevent injuries. Strength exercises should be performed 3-4 days per week for maximum benefit.

Single Leg Bridge

  • Begin on your back, one knee bent, and the other leg extended with both legs aligned.
  • Tighten your abdominals and lift your hips off the floor, then lower down.
  • Repeat on the same side 10 times then switch legs. Repeat for a total of 3 sets on each side.
  • Make sure to keep your abdominals tight the whole time and do no use your lower back to lift.


Glute bridge
Glute bridge

Backward Step Down

  • Begin standing on top of a step.
  • Balance on one leg and lower the other leg behind you slowly.
  • Lightly touch your foot to the ground then return to the starting position and repeat.
  • Make sure to maintain your balance on the one leg during the exercises, keeping your knee facing forward.
  • Repeat on the same side 10 times then switch legs. Repeat for a total of 3 sets on each side.


Back Step-down

Reverse Lunge

  • Begin standing with your feet shoulder width apart.
  • While keeping your trunk upright, step back and lower your hips down toward the floor.
  • Return to the starting position then repeat on the other side.
  • Make sure to keep your abdominals tight and keep your knee and toes pointing forward. Never let your knee move forward beyond your toes.
  • Repeat 10 times on each leg. Perform 3 sets.
Reverse Lunge

The Importance of Mobility and Mobility Training

The Importance of Mobility and Mobility Training

By: Becky Bujwit, PT, DPT, SCS

Becky Bujwit, PT, DPT, SCS

The term mobility is frequently used these days, but what does it mean? Mobility refers to how well you can move your body through a range of motion. It encompasses muscle strength, range of motion, and endurance capacity. With good mobility, you will be able to move efficiently with little to no restrictions which thus limits the likeliness of injuring yourself. The American Council of Exercise (ACE) calls mobility the cornerstone of fitness, which allows the body to move correctly. Without mobility, your posture becomes compromised and your body begins to move improperly. When this occurs your risk of pain and injury increases significantly. Actively working on mobility is called mobility training.

There are several benefits to performing mobility training. It helps to prepare the body for the stress of training, helps to reduce the risk of injury, and it improves range of motion. As we begin to move and warm up our body, blood flow increases to our muscles which helps to prepare the muscles to work. Synovial fluid, the fluid in our joints that helps them to glide freely, is carried to the joints as well. These benefits are important to help prevent injuries while performing your sport or workout by allowing for improved form and technique.
Mobility training can be performed many ways: foam rolling, using a massage stick, stretching, doing body weight movements, and massage guns are some of the ways that you can improve your overall mobility. One isn’t necessarily better than the other, all of them have their own benefits. The best thing is that when performed correctly they all result in a positive outcome, increased mobility and range of motion.

The most popular form is foam rolling. It involves rolling your muscles up and down on a roll of foam. It typically is uncomfortable or even painful, but that can mean you need to be doing it even more. The more frequently one performs mobility, the less painful it will become.

Below is an example of rolling out your quadriceps and hamstrings.

Glute bridge
Glute bridge

Another form similar to foam rolling is using a massage stick. The massage stick is typically less painful and a little easier to use, but it might not be as effective as foam rolling. Below is an example of using a massage stick on your quadriceps.

Back Step-down

The final option in this category is the use of a new piece of technology, a massage gun. These are more expensive but very popular. The gun uses vibration and pressure to help loosen up the muscles. It is also an effective way to improve one’s mobility.

You can also use body weight to perform movements to improve your mobility prior to a workout as well. These are best done after you have performed other mobility work. Below is one example of the many different movements that can be performed. This movement targets hamstrings, knees, ankles, and quadriceps.

Glute bridge
Glute bridge

There are many other ways and many other devices out there to help you achieve improved mobility. The important thing is to incorporate it into your life, particularly before your workouts to help improve your maximum potential and prevent injuries!

Balance Exercises for Runners

Balance Exercises for Runners

By: Shana Urban PT, DPT, ATC, CSCS

While running, we spend 0% of the time on two feet. Balance and single leg stability are extremely important for proper running form. Adding balance and single leg exercises to your workout will be very beneficial to improve your running.

Single Leg Knee Drive

  • Begin standing on one leg with the other raised and opposite arm in running position.
  • Straighten the bent leg and reach it behind you. Bend trunk slightly forward, bending the other knee slightly and bring the other arm forward.
  • Return to the starting position by driving the knee up and forward, then repeat.
  • Try to maintain balance by keeping the foot, knee, and hip aligned facing forward.
  • Repeat 10 times then switch sides.
  • Perform a total of 3 sets on each side.
Single Leg Knee Drive Start
Single Leg Knee Drive

Single Leg Hip Abduction with a Band

  • Resistance band can be placed around thighs, ankles, or feet.
  • Begin standing on one leg with the other leg hanging off a ledge, platform, or step.
  • Extend your non-standing leg slightly back so that your toes are in line with the heel of the other foot.
  • Slowly move your leg out to the side keeping your knee straight and your toes facing forward. Upper body should not lean.
  • Then return to the starting position while maintaining balance on one leg.
  • Repeat 10 times then switch sides. Perform a total of 3 sets on each side.
Single Leg Hip Abduction with a Band

Single Leg Balance on Pillow

  • Begin standing with knees unlocked on a firm pillow or folded up blanket.
  • Slowly lift one foot off the ground and maintain balance.
  • Make it more challenging by closing your eyes.
  • Attempt to maintain for at least 30 seconds then switch sides.
  • Repeat 5 times on each side. 
Single Leg Balance on Pillow

So… You want to get into Running?

So…you want to get into running?

By: Dani Fisher, PT, DPT, ATC


Dani Fisher, PT, DPT, ATC

Important aspects to consider when you are first starting to run are:

  • Training Plan
  • Strengthening Program
  • Warm-up and Cool Down
  • Mobility Work
  • Knowledge of Running Form
  • Hydration and Heat
  • The Right Running Shoes

Training Plans will vary significantly for each runner. First, figure out your goals and then develop your training to reach them. In the beginning, start with short running intervals. Remember to gradually increase your mileage each week. Try to only change one variable at a time. Incorporate rest and recovery days – at least one a week. Address injuries early. Don’t get discouraged – some runs will feel better than others. Have fun!

Strengthening is VERY important! Running can predominantly be a quad activity which can create muscle imbalances where you are stronger in the front of your legs and weaker in the back side of your legs. A good strengthening program includes exercises for your core, glutes, hamstrings and calves to keep you balanced and reduce risk of injury. Cross training with non-impact cardio can also be vital.

Prior to running, you want to perform a warm-up which could include dynamic stretching, activation exercises and/or running drills. Individualize your warm-up to help you feel prepared and ready to run. Post running, perform your cool down which could include light jogging, walking and/or static stretching.

Mobility is the body’s ability to move through a full range of motion. Running can cause tight muscles and decrease your mobility. To combat this, find a routine that loosens the muscles. Options include foam rolling, rolling on a lacrosse ball, using a massage gun or stick, static stretching and/or massaging. Consistency is important! It is much more effective to perform frequently rather than waiting until you feel tight.

Proper running form includes:

  • Head – look forward, not down at your feet
  • Arms – swing forward and back, with palms open
  • Shoulders – think relaxed and loose
  • Legs – keep beneath you with a quick leg turnover and short stride
  • Torso – think tall
  • Ankles/Feet – land lightly then push off with maximum force
Proper running form

During summer, it is important to acclimate to the heat. It takes 7-14 days for the body to get used to exercising in the heat. Remember to gradually increase your frequency and intensity as the heat rises! Hydration is another key component to success. On average, men should consume 15.5 cups of water/day and women should consume 11.5 cups/day though this may vary from person to person.

Lastly, find the right running shoes for you. This will depend on your goals, running terrain, foot structure and comfort.

Now, are you ready to run?